이번 글에서는 linux user마다 ssh 접근할 때 다른 인증방식을 사용하여 접근할 수 있도록 구성하고자 합니다. 이러한 내용들의 글이 존재하지 않아 직접 글을 쓰려고 합니다. 참고로 저는 Amazon Linux 2023을 사용하였습니다.
1. Google Authenticator 설치 및 구성
Google OTP 인증을 사용하기 위해서 먼저 package를 설치해야 합니다.
sudo yum install google-authenticator -y
설치를 마쳤다면 Google Authenticator를 구성해야 합니다. 여기서 만약 QR 코드를 사용하여 인증하고 싶으시다면 qrencode라는 package 또한 설치하시면 됩니다.
아래 명령어를 사용하는 user에 google otp가 추가되기 때문에 otp를 추가하고 싶은 user에 접근 후 명령어 사용합니다.
google-authenticator
# 인증 토큰을 시간 기반으로 설정하시겠습니까? y/n

Do you want authentication tokens to be time-based (y/n)
# -1을 입력하면 OTP 코드를 입력하는 과정을 건너뛰게 됩니다.
# 건너뛰기 전 QR 혹은 Secret을 저장해둡니다.
Warning: pasting the following URL into your browser exposes the OTP secret to Google:
https://www.google.com/chart?chs=200x200&chld=M|0&cht=qr&chl=otpauth://totp/ec2-user@ip-172-31-9-125.ap-northeast-2.compute.internal%3Fsecret%3DIEWP54VKXT4KOVXVPPGJVJOPS4%26issuer%3Dip-172-31-9-125.ap-northeast-2.compute.internal
Failed to use libqrencode to show QR code visually for scanning.
Consider typing the OTP secret into your app manually.
Your new secret key is: IEWP54VKXT4KOVXVPPGJVJOPSXX
Enter code from app (-1 to skip):# "/home/ec2-user/.google_authenticator" 파일을 업데이트하시겠습니까? y/n
Do you want me to update your "/home/ec2-user/.google_authenticator" file? (y/n)# 동일한 인증의 여러 사용을 허용하지 않으시겠습니까 y/n
Do you want to disallow multiple uses of the same authentication
token? This restricts you to one login about every 30s, but it increases
your chances to notice or even prevent man-in-the-middle attacks (y/n)# 기본적으로 모바일 앱은 30초마다 새로운 토큰을 생성합니다.
# 클라이언트와 서버 간의 가능한 시간 왜곡을 보완하기 위해,
# 현재 시간 전후에 추가 토큰을 허용합니다. y/n
By default, a new token is generated every 30 seconds by the mobile app.
In order to compensate for possible time-skew between the client and the server,
we allow an extra token before and after the current time. This allows for a
time skew of up to 30 seconds between authentication server and client. If you
experience problems with poor time synchronization, you can increase the window
from its default size of 3 permitted codes (one previous code, the current
code, the next code) to 17 permitted codes (the 8 previous codes, the current
code, and the 8 next codes). This will permit for a time skew of up to 4 minutes
between client and server.
Do you want to do so? (y/n)# 로그인 시도 횟수를 3회 이하로 제한합니다. y/n
If the computer that you are logging into isn't hardened against brute-force
login attempts, you can enable rate-limiting for the authentication module.
By default, this limits attackers to no more than 3 login attempts every 30s.
Do you want to enable rate-limiting? (y/n)2. SSH edit Config file
Google OTP 설정을 마쳤다면 이제 ssh config file을 수정해야 합니다.
sudo vim /etc/pam.d/sshd인증 순서에 관해서 설명을 드리자면 이 파일 순서대로 password -> google otp 순서입니다. 이 순서를 반대로 하고 싶으시다면 맨 아랫줄에 추가한 값들을 맨 윗줄에 적으시면 됩니다. 다 적으셨다면 sshd_config 파일도 수정해 줍니다.
#%PAM-1.0
auth       substack     password-auth # google otp만 사용하실 분들은 이부분 주석처리
auth       include      postlogin
account    required     pam_sepermit.so
account    required     pam_nologin.so
account    include      password-auth
password   include      password-auth
# pam_selinux.so close should be the first session rule
session    required     pam_selinux.so close
session    required     pam_loginuid.so
# pam_selinux.so open should only be followed by sessions to be executed in the user context
session    required     pam_selinux.so open env_params
session    required     pam_namespace.so
session    optional     pam_keyinit.so force revoke
session    optional     pam_motd.so
session    include      password-auth
session    include      postlogin
# 맨 아랫줄에 아래 값들 추가
# nullok: OTP가 설정되지 않은 경우에도 로그인 허용
auth       required     pam_google_authenticator.so nullok try_first_pass no_increment_hotp
auth       required     pam_sepermit.so
인증 순서에 관해서 설명을 드리자면 이 파일 순서대로 password -> google otp 순서입니다. 이 순서를 반대로 하고 싶으시다면 맨 아랫줄에 추가한 값들을 맨 윗줄에 적으시면 됩니다. 그리고 만약 google otp만 사용하고 싶으시다면 password-auth를 주석처리 하시고 /etc/ssh/sshd_config에서 수정하시면 됩니다.
다 적으셨다면 sshd_config 파일도 수정해 줍니다.
sudo vim /etc/ssh/sshd_config여기서 만약 Google OTP와 Password르 같이 사용하고 싶으시다면 아래의 PasswordAuthendtication 부분을 yes로 변경합니다.
# Explicitly disable PasswordAuthentication. By presetting it, we
# avoid the cloud-init set_passwords module modifying sshd_config and
# restarting sshd in the default instance launch configuration.

ChallengeResponseAuthentication yes
UsePAM yes
PasswordAuthentication no
PubkeyAuthentication yes
KbdInteractiveAuthentication yes

# Change to no to disable s/key passwords
#KbdInteractiveAuthentication yes

...
# 맨 밑줄에 아래의 값 추가
AuthenticationMethods publickey,keyboard-interactive
sshd_config를 수정했다면 /etc/ssh/sshd_config.d/50-redhat.conf 파일도 수정해야 sshd service가 정상적으로 재시작이 됩니다.
sudo vim /etc/ssh/sshd_config.d/50-redhat.conf
위에서 추가한 값과 똑같이 적으시면 됩니다.
# This system is following system-wide crypto policy. The changes to
# crypto properties (Ciphers, MACs, ...) will not have any effect in
# this or following included files. To override some configuration option,
# write it before this block or include it before this file.
# Please, see manual pages for update-crypto-policies(8) and sshd_config(5).
Include /etc/crypto-policies/back-ends/opensshserver.config

SyslogFacility AUTHPRIV

ChallengeResponseAuthentication yes
GSSAPIAuthentication yes
GSSAPICleanupCredentials no
UsePAM yes
ChallengeResponseAuthentication yes
PasswordAuthentication yes
PubkeyAuthentication yes
KbdInteractiveAuthentication yes
...
수정을 마쳤다면 이제 password와 google otp를 같이 사용하실 분은 password를 추가해야 합니다. google otp만 사용하실 분은 password 설정하는 명령어를 생략 후 sshd service를 재시작하시면 됩니다.
echo '<원하는 password 값>' | passwd --stdin <user name>sudo systemctl restart sshd3. OTP 추가 및 테스트
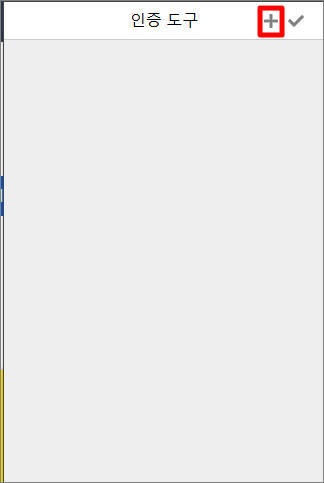
여러 프로그램이 존재하지만 저는 chrome에서 지원하는 인증도구를 사용해 보겠습니다.
인증 도구 - Chrome 웹 스토어
인증 도구는 브라우저에서 2단계 인증 코드를 생성합니다.
chromewebstore.google.com
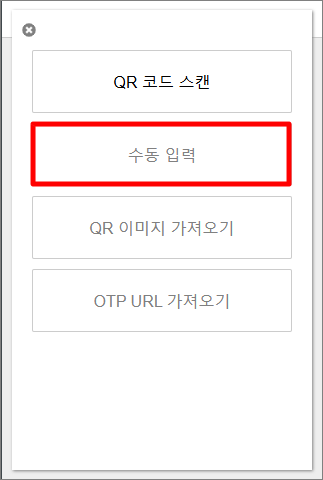
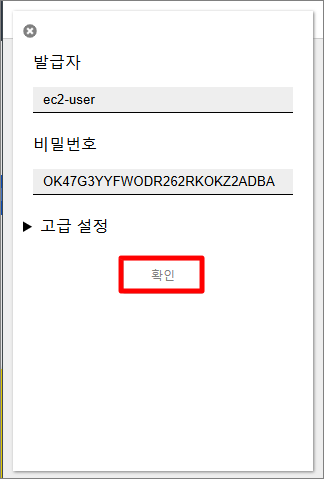
위 사이트에 접속하신 후 인증도구를 추가합니다. 추가하셨다면 QR로 인증하시거나 Secret Key를 이용하여 추가하시면 됩니다. 저는 Secret Key를 사용하여 추가해 보겠습니다. 비밀번호에는 Secret Key를 넣어줍니다.

OTP 추가가 끝났다면 ssh 접근이 가능한 프로그램을 사용하여 google otp 설정한 user에 ssh 접근 시도를 합니다.
저는 password를 설정하였기 때문에 password를 먼저 입력하라고 나옵니다.
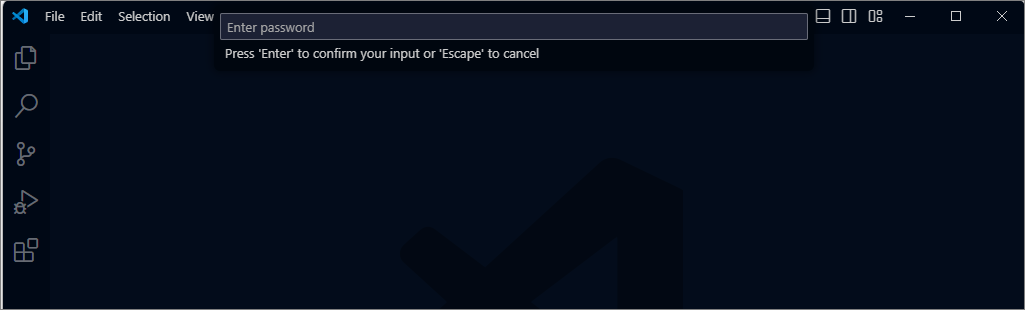
verification code 값을 입력하라고 뜨면 otp 인증 코드를 입력하시면 됩니다.

'Linux' 카테고리의 다른 글
| [Linux] Docker Swarm으로 마이크로서비스 구축하기 (0) | 2025.02.12 |
|---|---|
| [Linux] Nginx Reverse Proxy를 구성해보자 (7) | 2024.10.21 |